

.jpg)
The engine is often the most expensive part of a yacht. As such, every component needs to be maintained regularly and logged meticulously in your boat management software.
The crankshaft is an essential element of the ship’s engine. A faulty crankshaft could result in complete engine failure and massive costs that could have been avoided in the first place.
In this article, we go over the basics behind the functioning of the crankshaft. More importantly, we explain why you should conduct a regular crankshaft deflection measurement and the steps you should take to do so.
Additionally, we take a look at the main tool used in measuring crankshaft deflection and detail the crankshaft deflection measurement procedure diagnostic engineers should be carrying out. Let’s get started!
Contents:
- What is a crankshaft?
- Why do we need to measure crankshaft deflection?
- Crankshaft measurement tools - deflection gauge
- Crankshaft deflection measurement procedure
- How to interpret crankshaft deflection measurement results
- Reasons for crankshaft deflection
What is a crankshaft?
The crankshaft is considered to be the backbone of all combustion engines. In a nutshell, the crankshaft transforms the linear motion of the pistons into rotational motion. Similar to a crank arm of a bicycle, the crankshaft rotates when the pistons go up and down, producing a rotating force.
This motion causes the propeller to rotate and ultimately drive the boat forward or backward. Consequently, the crankshaft rotates hundreds of thousands of times per minute, which is why it should be extremely sturdy and resistant to deformation.
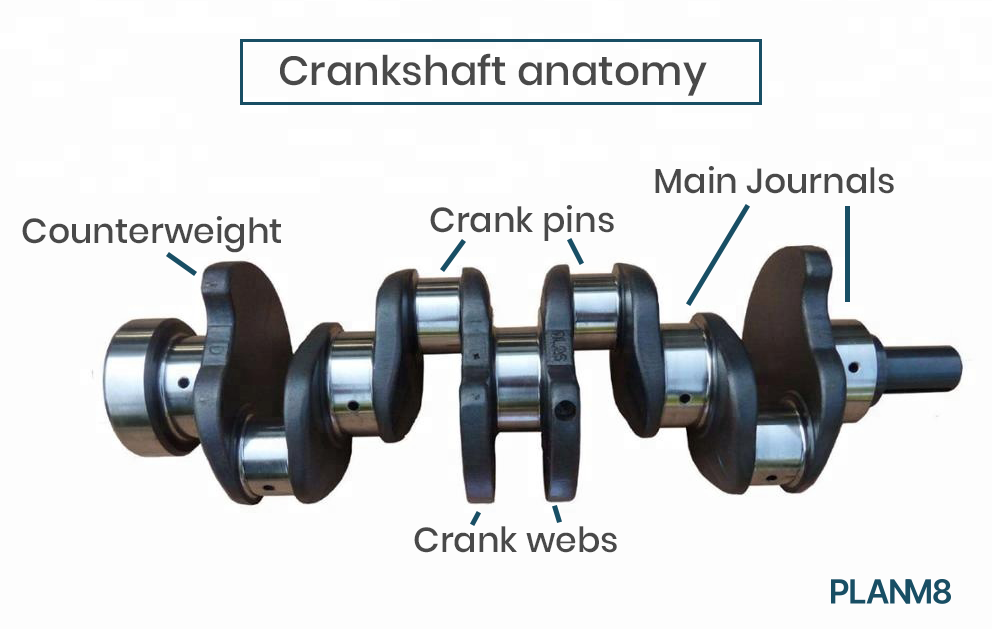
Main components of a crankshaft
Crankshafts are made out of the following components:
- Main journals - which run in the main bearings and define the axis of rotation of the crankshaft.
- Crankpin (rod journal) - which connects the crankshaft to the rod for each cylinder.
- Crank webs - which connect the crankpins to the main journals.
- Counterweights - which help with the rotating motion of the crank webs and provide balancing.
Different types of crankshafts by the fabrication method
The construction and manufacture of crankshafts is an elaborate and complicated process. There is a wide array of types of crankshafts following their manufacturing method, including:
- Fully forged - made of a single piece of metal, these crankshafts have the advantage of being extremely sturdy. However, their manufacturing process doesn’t allow for the creation of large units.
- Semi-built - where several pieces of the crankshaft are modeled from a single piece, then fitted together.
- Fully built - where each piece of the crankshaft is manufactured separately and shrink-fitted after the fact.
Why do we need to measure crankshaft deflection?
The weight of the crankshaft is supported by the bearings at the main journals. Additionally, crankshafts regularly endure huge forces and temperature changes. With extended use, the bearings will suffer some wear, which may not be uniform across the crankshaft.
As such, the initial straight line of the crankshaft may get deformed, either upward or downwards. And while these deformations are usually invisible to the naked eye, they can cause dangerous deflections in the crankshaft webs. Due to metal fatigue, this could lead to damage within the engine.
Regular boat maintenance helps engineers detect these misalignments in the bearings of the crankshaft and prevent failures of the component.
This is extremely important, as crankshaft failure isn’t a discreet matter - it’s usually followed by excessive noises, low oil levels, and complete seizing of the engine. All of these can be considered major defects, and more often than not, you will be obligated to replace the entire component.
With that said, replacing the crankshaft isn’t a benign intervention. It requires a full engine rebuild, and depending on the size of the vessel, it can take days, even weeks before it can be fully mended.
Moreover, the part itself is quite expensive and once again, this price will increase with the size of the ship. And the crankshaft failure itself can cause additional damage to internal parts of the engine, driving reparation costs through the roof.
All in all, you should perform crankshaft deflection measurements regularly to prevent these extreme repair costs and detect signs of trouble early on.
Crankshaft measurement tools - deflection gauge
The deflection gauge is the main tool you will be using to conduct crankshaft deflection measurement. These gauges can be either mechanical or digital. While the digital type will directly show you the exact readings, it’s worth detailing how to interpret the readings on a dial deflection gauge.
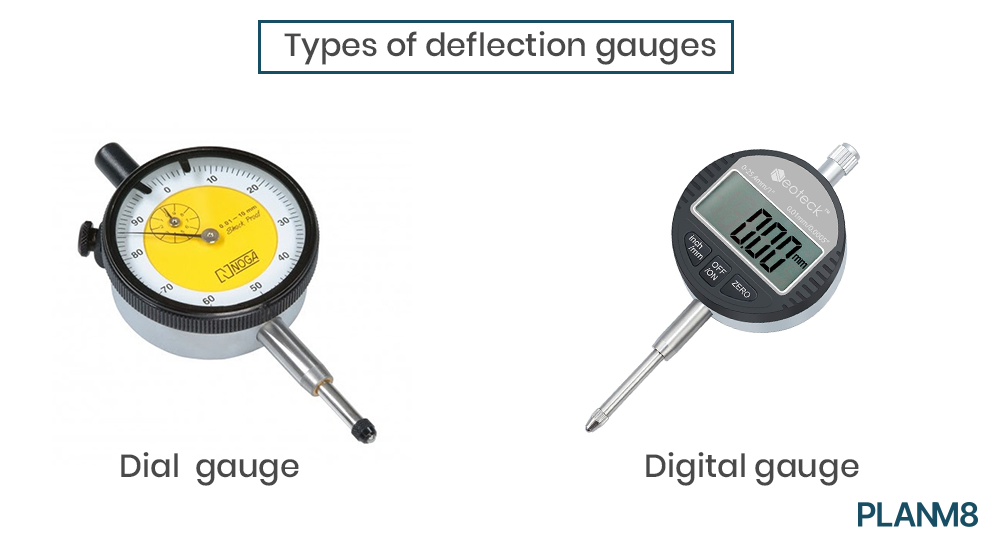
Essentially, the deflection gauge shows us the distance between adjacent crank webs, which are read at different angular positions of the shaft. The strain applied to the stylus of the gauge shows the flexing motion between two crank webs, showing even minimal variations.
As a result, the dial can turn in a clockwise and anti-clockwise manner:
- A clockwise rotation of the dial needle shows a closing of the webs. The correspondent reading is taken as a negative value.
- An anti-clockwise rotation of the dial needle shows a separation of the webs. The reading is taken as a positive value.
All in all, the deflection gauge is a fairly simple tool to use, as long as you are familiar with the crankshaft deflection procedure explained below.
Crankshaft deflection measurement procedure
Now that you are familiar with the deflection gauge, let’s delve more into the detail of the crankshaft deflection measurement procedure. There are a few prerequisites that need to be fulfilled prior to taking your measurements, including:
- The ship should be afloat when taking measurements.
- Because the engine temperature can cause variations in measurements, readings should always be done when the engine is cooled off.
- The ship’s bridge should be notified of the procedure and prevented from turning on the engine.
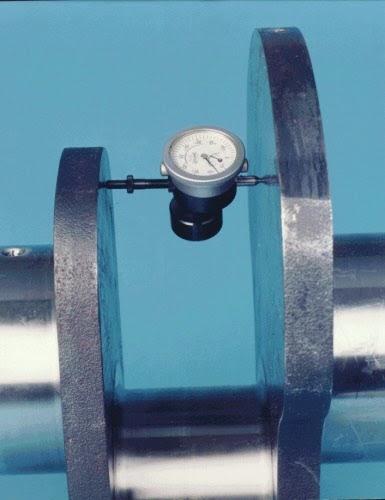
- The gauge should be placed opposite the crankpin.
- The mounting position should be marked by a punch mark on the crank web itself.
Once you’ve ensured these conditions are met, you can proceed with your measurements as follows:
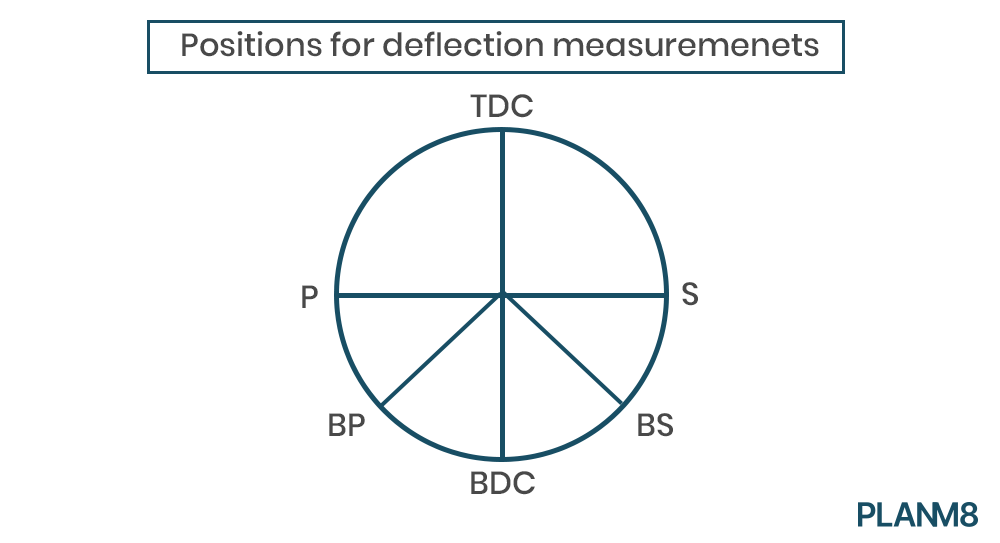
1. Begin with the measurements starting on the Bottom Port (BP) position of the crankshaft.
2. Turn the crankshaft clockwise and proceed with taking the measurements for each one of the positions noted on the graphic above.
- Bottom port (30° clockwise from the most bottom position) (BP)
- Port (P).
- Top of the crankshaft (TDC).
- Starboard - to take the measurement for this position, you can use a mirror installed on a flexible arm (S).
- Bottom starboard (BS).
3. Repeat the procedure for each one of the cylinders of the crankshaft.
4. Take note of each measurement in the table below:
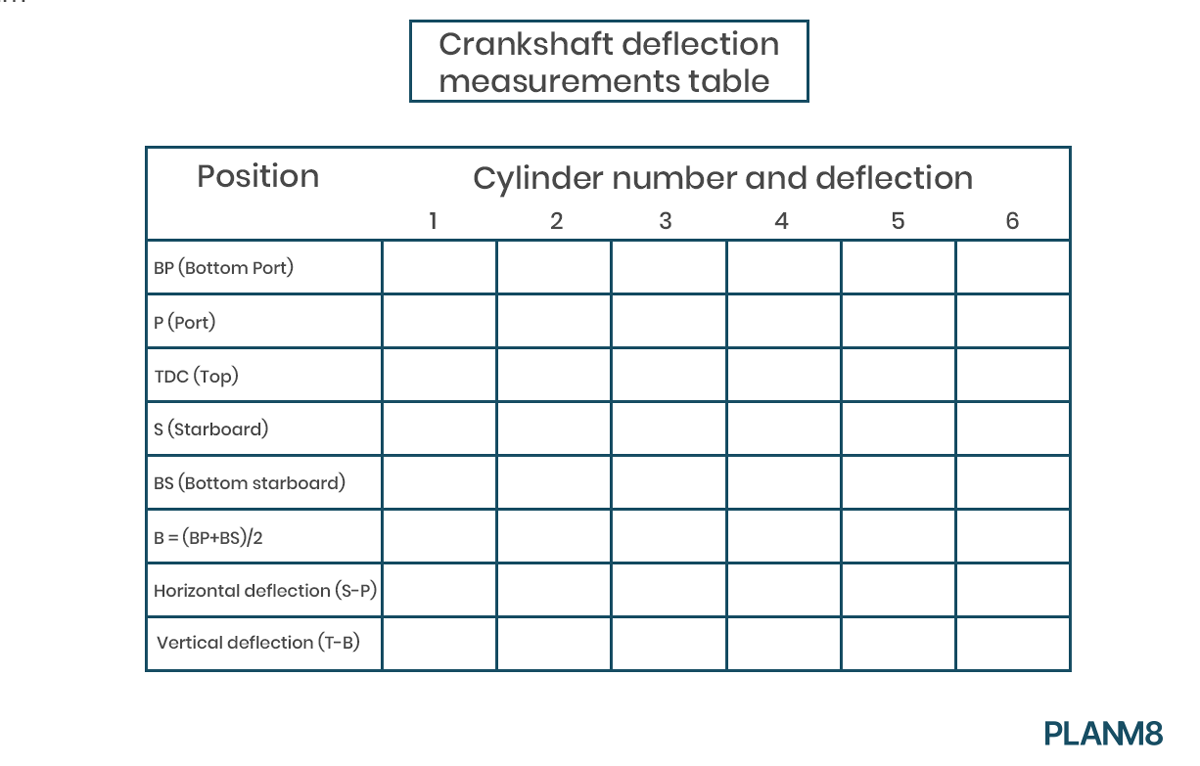
5. Calculate the following deflections:
- B as the average of the Bottom port and Starboard deflections.
- The horizontal deflection (S-P).
- The vertical deflection (T-B).
Take a look at the video below for a visual representation of the procedure.
How to interpret crankshaft deflection measurement results
First of all, you need to compare the vertical and horizontal deflections to the allowed limits provided by your engine manufacturer. Consult your yacht engine manual to compare these results and assess whether the crankshaft is aligned following the manufacturer’s specifications.
Another good rule of thumb is to compare your readings with those of your previous crankshaft deflection measurement. This way, you can detect abnormal or high deflections that might have occurred in a short time span.
With that said, many engineers prefer to double-check these results by drawing a deflection curve that provides a graphical representation of the results.
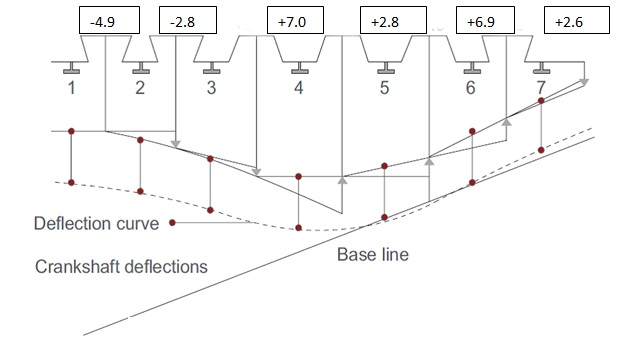
Here’s how to proceed to plot a deflection curve using the vertical deflections for each unit:
- Draw a horizontal reference line below the crankshaft.
- For every unit, draw a vertical line representing the vertical deflection measurement for this unit.
- Draw a soft curve using the points obtained by the measurements.
- Finally, draw a baseline (tangent) to this curve to see which units deviate the most from the deflection curve.
This allows us to assess whether there are additional misalignments between the webs, even though the deflection values are within the manufacturer’s limits.
Reasons for crankshaft deflection
Once you have conducted your crankshaft deflection measurement, you can explore the wide array of causes for deflection, if present. Below is a small sample of what could cause deflection in the crankshaft.
- Loose foundation bolt leading to vibration.
- Ship hull deformations due to an incorrect load of cargo.
- Ship hull deformations due to high discrepancy between sea temperature and air temperature. For example, an extremely cold sea causes the hull to contract, while hot air temperatures cause the deck to expand.
- Crack in the bearing saddle.
- Bearing wear due to usage over time.
- Strong variations temperature (engine fire, explosion, etc. )
- Human error. If deflections are high without any of the aforementioned reasons, the engineer should recheck their measurements.
Conclusion
In this article, we explored the importance of regularly running a crankshaft deflection measurement. To this end, we looked in detail at the composition of a crankshaft and what purpose it serves.
In a more practical manner, we learned about the deflection gauge as the main tool for carrying on these measurements and how it should be used. Finally, we provided a step-by-step guide of the crankshaft deflection measurement procedure, as well as some tips on interpreting these results.


